
Where to start
Inboxes → Manage → Chat invitation / Automatic reply
For panel settings, sign in to the intended workspace with a role that has access to that section. Available tools depend on your plan and configured services.
Step 1
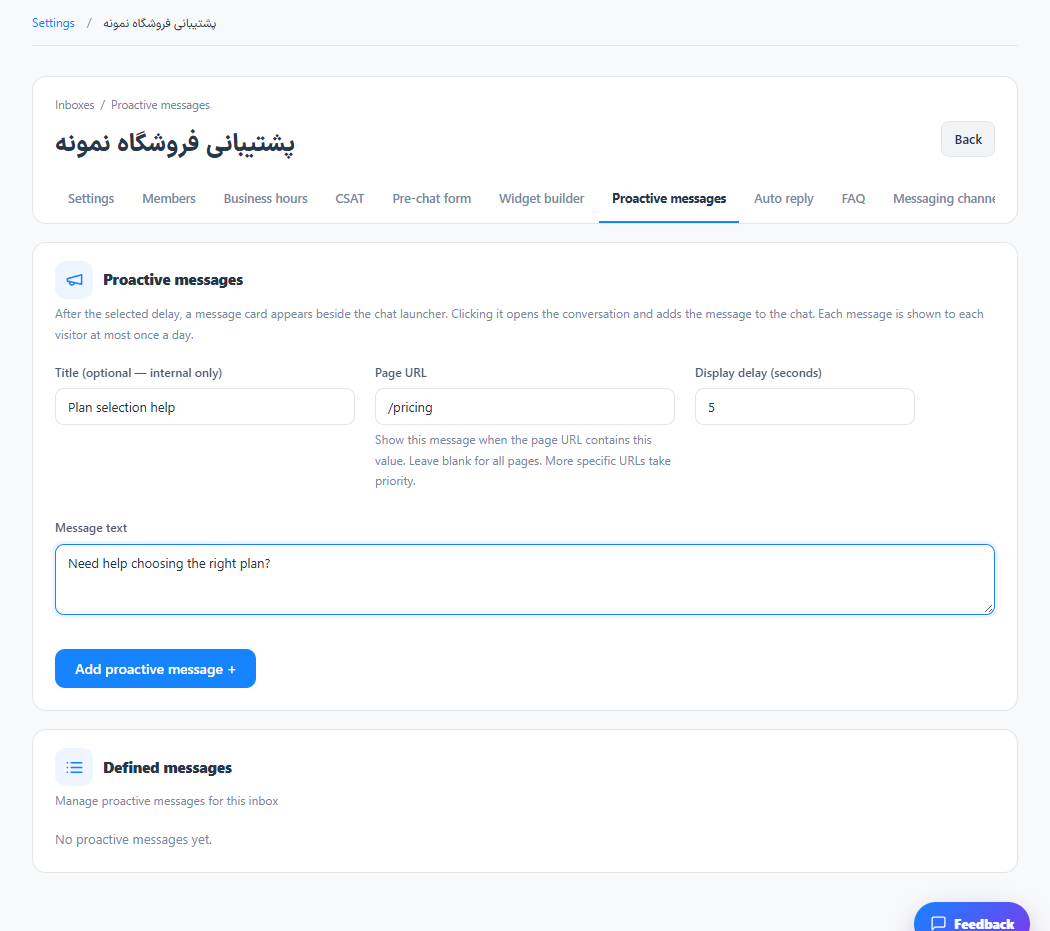
Add an invitation with a title, page URL rule, delay and a helpful message.
Step 2
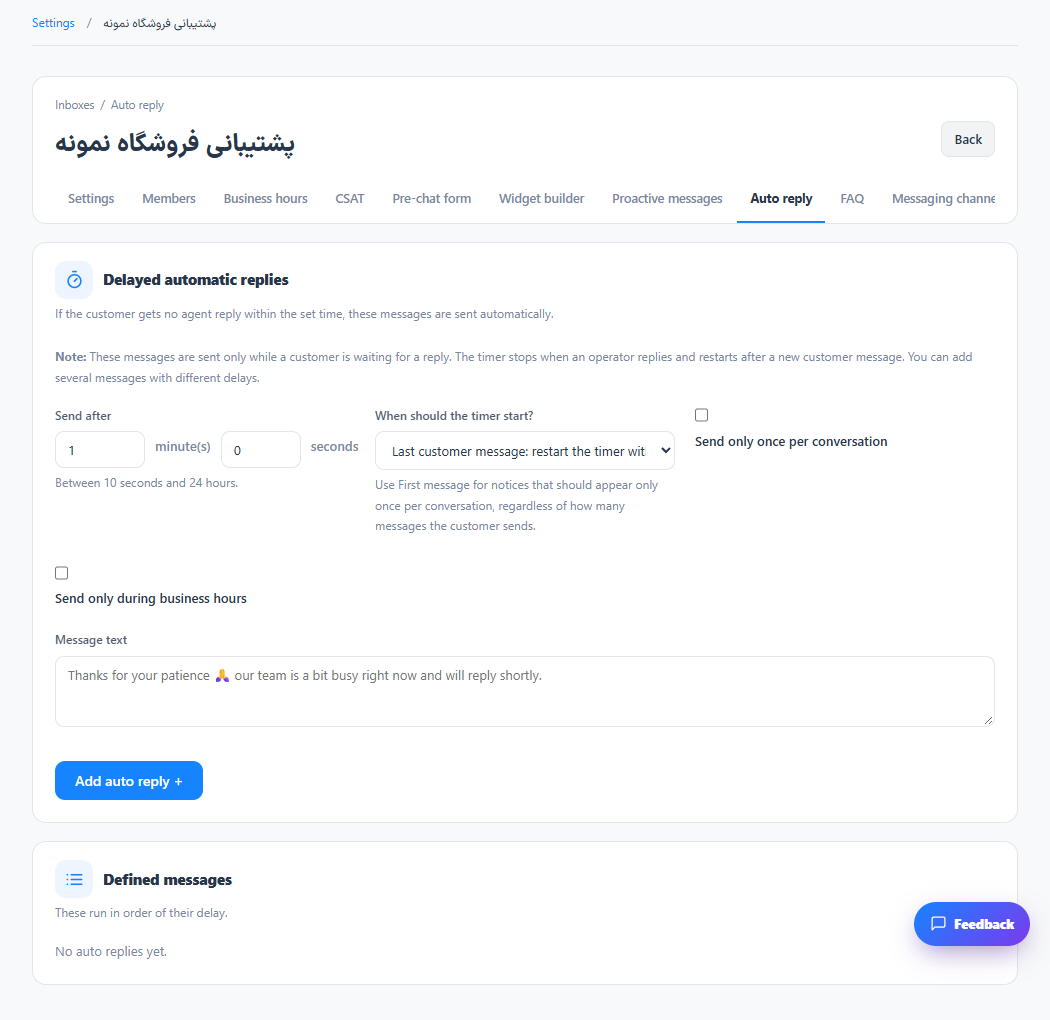
For delayed follow-up, configure the trigger, delay and repeat or business-hours restrictions.
Step 3
Save and visit a matching page in a new session. Confirm that timing and targeting match your intention.
Check the result
Eligible visitors receive the configured message when its conditions are met.
If something does not work
Check the selected workspace and inbox, your access role and the save confirmation. Reload the page to confirm the saved state. If the issue continues, contact support with the page name and error text.
Contact support