
Where to start
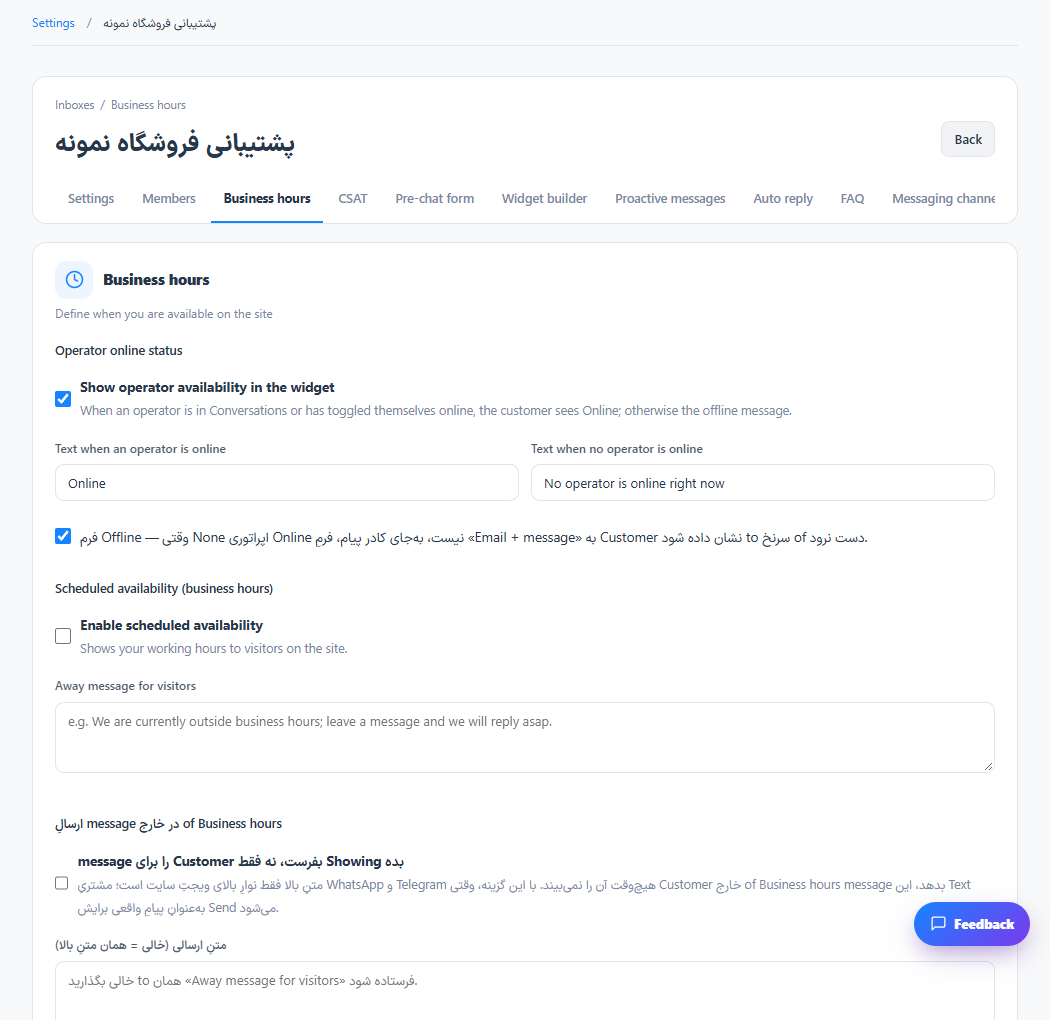
Inboxes → Manage → Business hours
For panel settings, sign in to the intended workspace with a role that has access to that section. Available tools depend on your plan and configured services.
Step 1
Select the inbox timezone before entering opening and closing times.
Step 2
Enable working days and set each day’s hours. Review the offline message settings.
Step 3
Save and check the widget inside and outside your schedule. Review business-hours filters in reports separately.
Check the result
The inbox has an explicit working schedule for the widget and supported time-based rules.
If something does not work
Check the selected workspace and inbox, your access role and the save confirmation. Reload the page to confirm the saved state. If the issue continues, contact support with the page name and error text.
Contact support