
Where to start
Settings → Chatbox and inboxes → Inboxes
For panel settings, sign in to the intended workspace with a role that has access to that section. Available tools depend on your plan and configured services.
Step 1
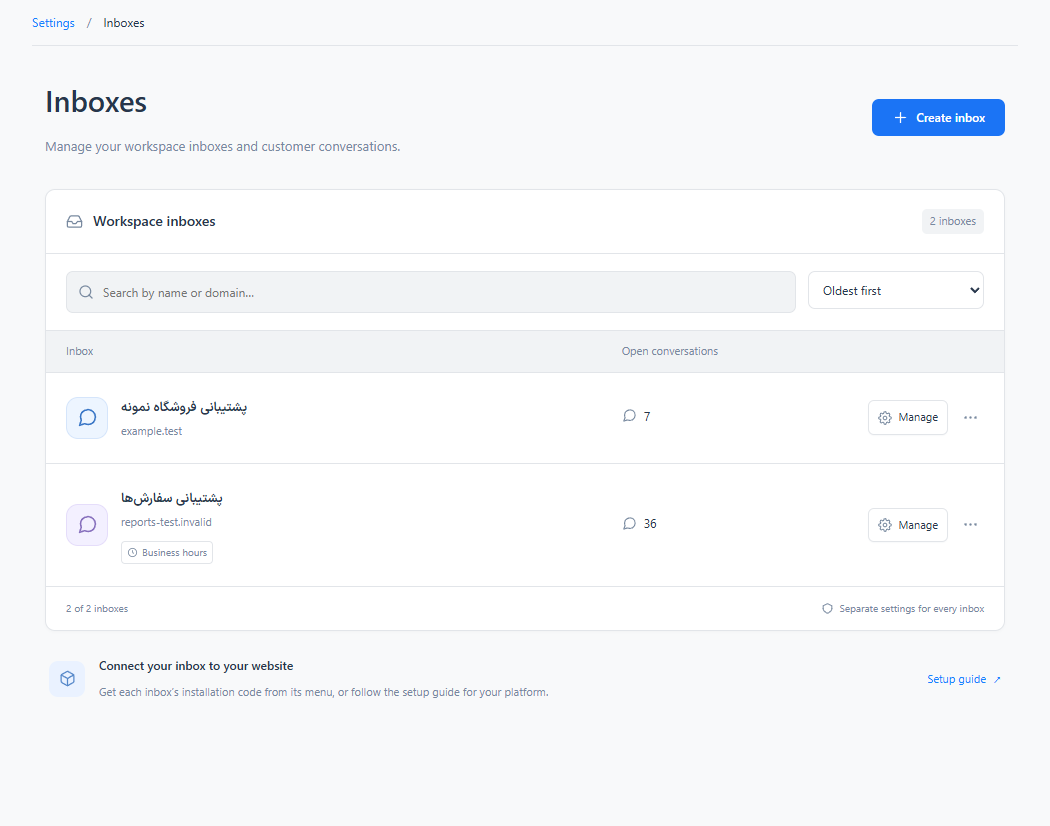
Choose Create inbox and enter a clear name for the website or support channel.
Step 2
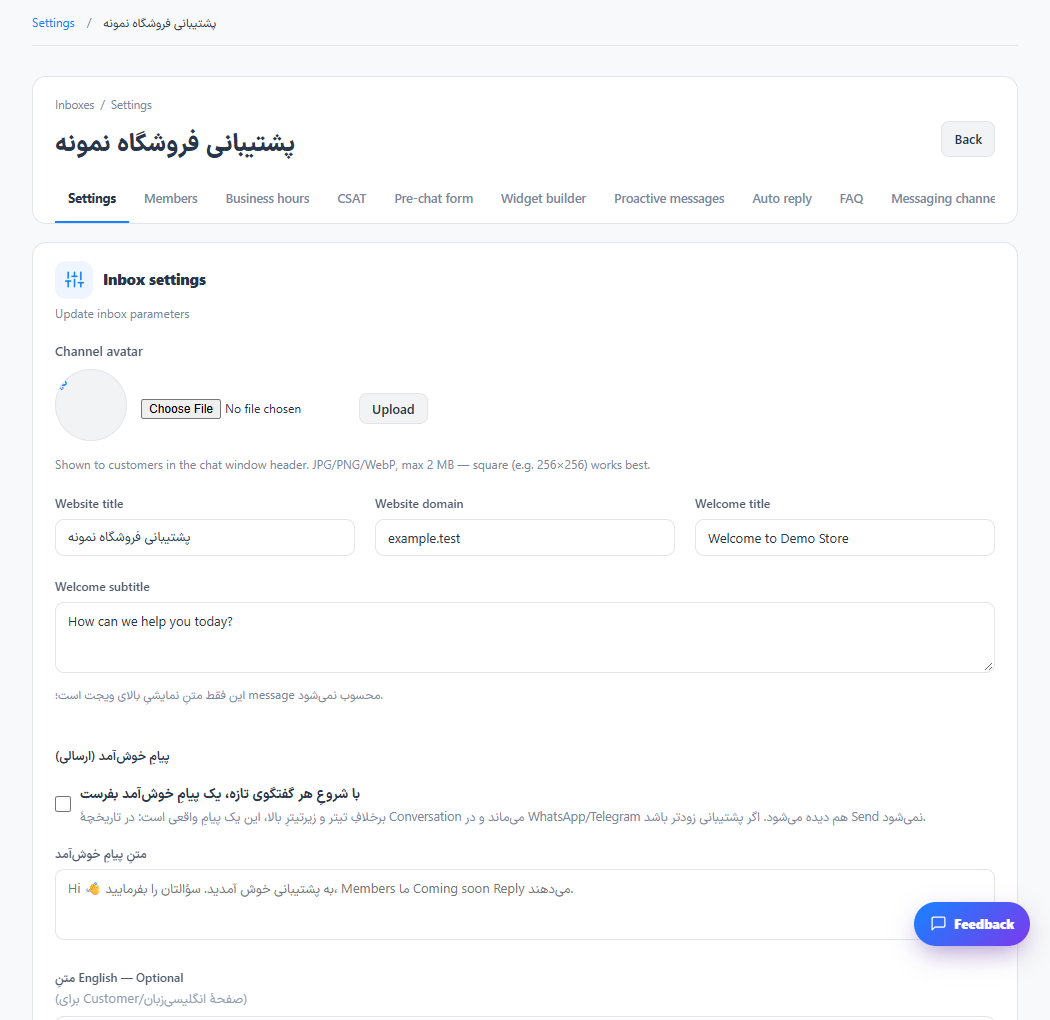
Open Manage to set the domain, operators and widget behavior for that inbox.
Step 3
Use Copy installation code or Test on the inbox row to install and verify the correct widget.
Check the result
Each inbox keeps its own configuration while conversations remain accessible in the shared panel.
If something does not work
Check that you selected the intended inbox before deleting or changing a connection.
Contact support