
Three widget themes
Choose from the available classic, modern and Hub themes to fit the way you want visitors to reach support.
Use the widget builder to set the theme, colors, welcome text, language and launcher appearance. Review changes in the live preview before applying them.
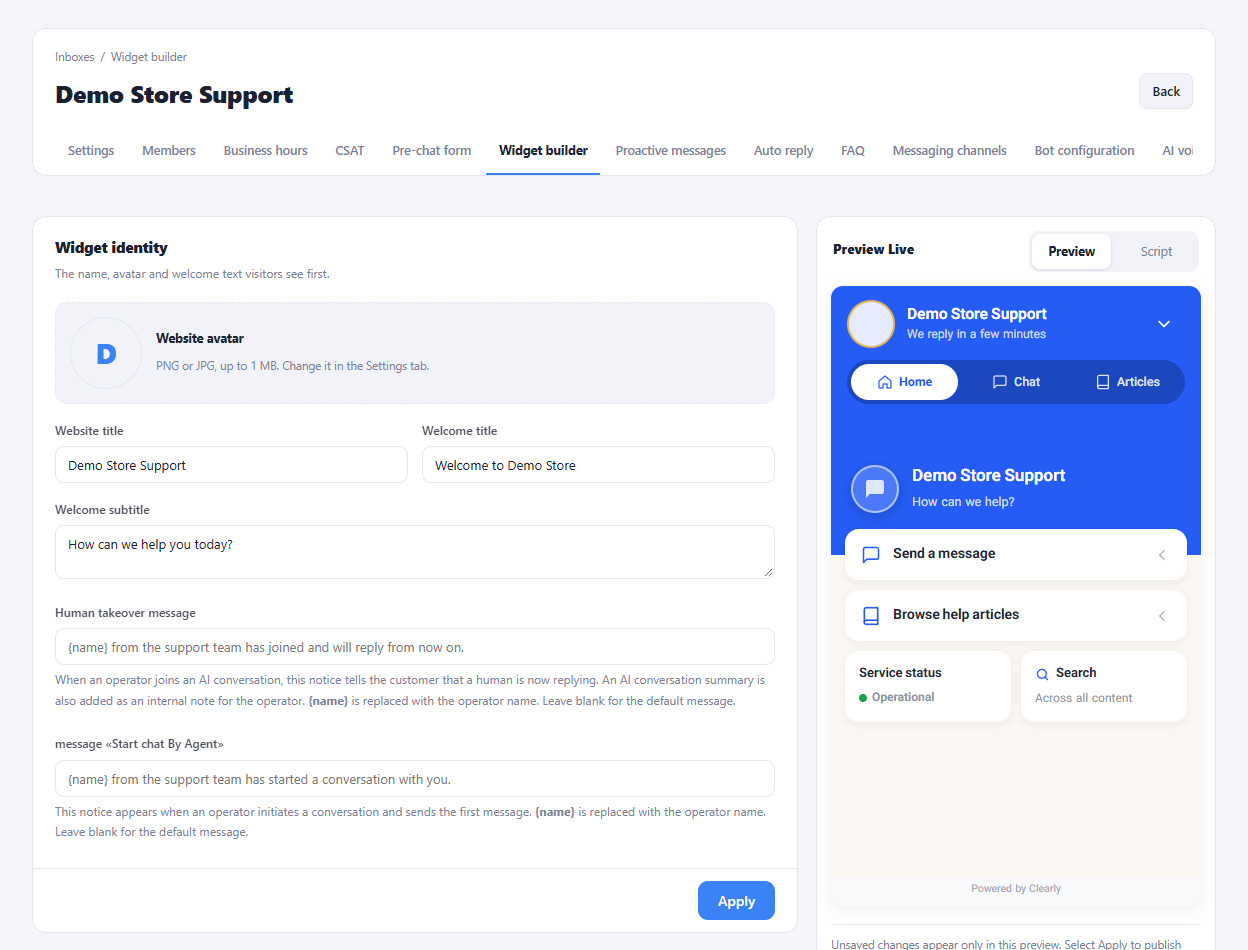
Choose from the available classic, modern and Hub themes to fit the way you want visitors to reach support.
Set the title, avatar, welcome text and color, with separate localized texts where needed.
Check the widget and launcher controls in the builder, then apply the configuration and review it on your website.
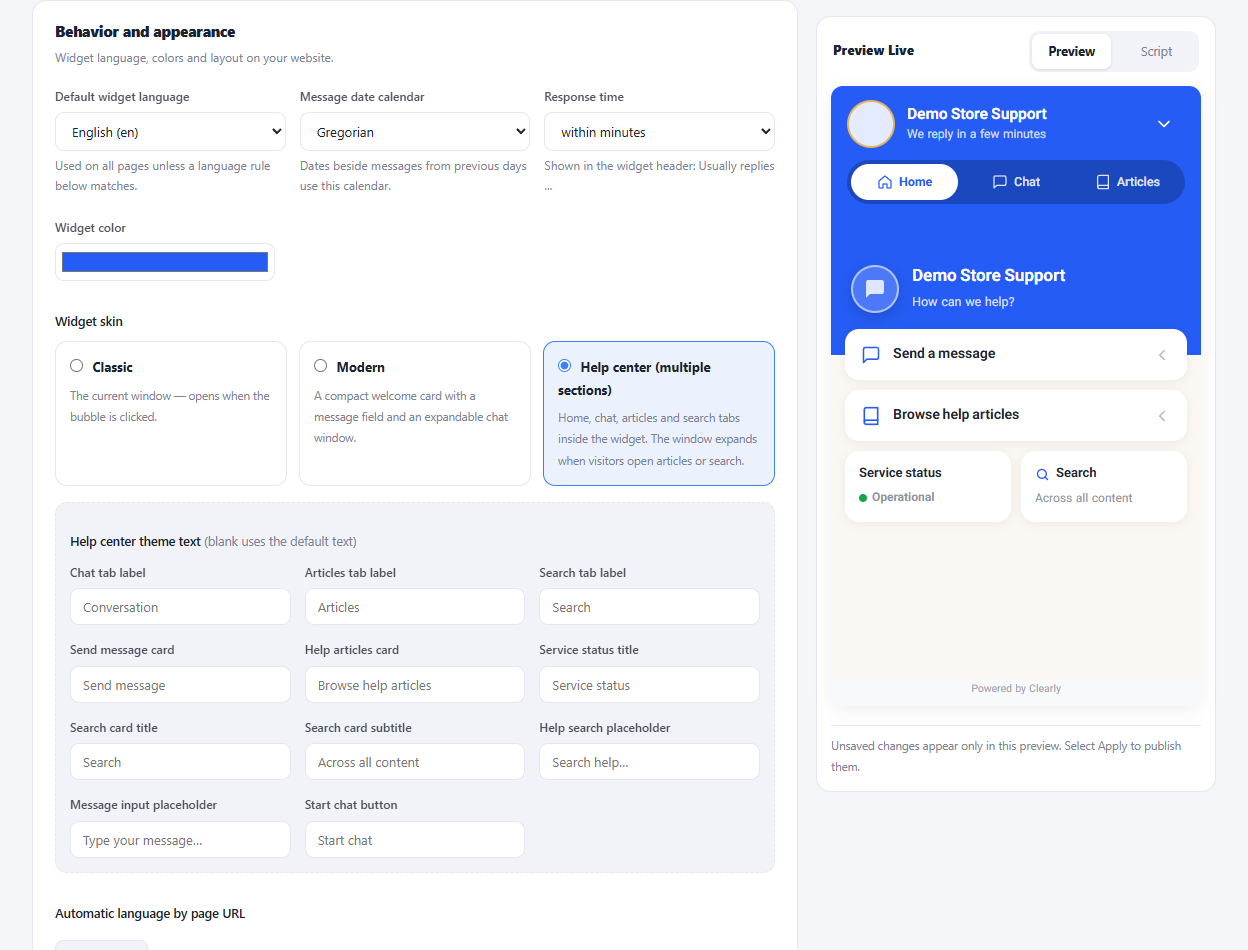
Open the builder for the website inbox you want to customize.
Choose a theme and adjust identity, text, language and appearance.
Review the preview, apply the changes and check a mobile screen.
The builder distinguishes preview changes from applied settings. Use the apply controls to publish the configuration you have reviewed.
Enlarge the product screenshots on this page or explore the interactive workspace demo. The demo uses local sample data; plan availability is listed on the pricing page.
Explore the workspace demoCompare the available plans and decide which capacities your support team needs.